FL studio has been used by music producers in the industry. FL Studio is a popular, adaptable DAW (Digital Audio Workstation) that is praised by producers for its simplified workflow, ease of use, and additional built-in features, whether you’re a complete beginner or a more skilled user.
Want to save time and become an expert in this tool?
With that said, here are my top ten FL Studio tips that every producer should be informed of. These suggestions should help you get more out of Fl Studio so you can concentrate on making beautiful music:
1. To used FL Studio as a Plug-in
FL Studio can be launched and run on Windows or macOS as an AU plugin. You can load up any other host (e.g. VCV Rack, Ableton Live, Logic Pro, etc.) All of FL Studio’s output will go through the host, and all of the tracks and playlists will be synchronized.
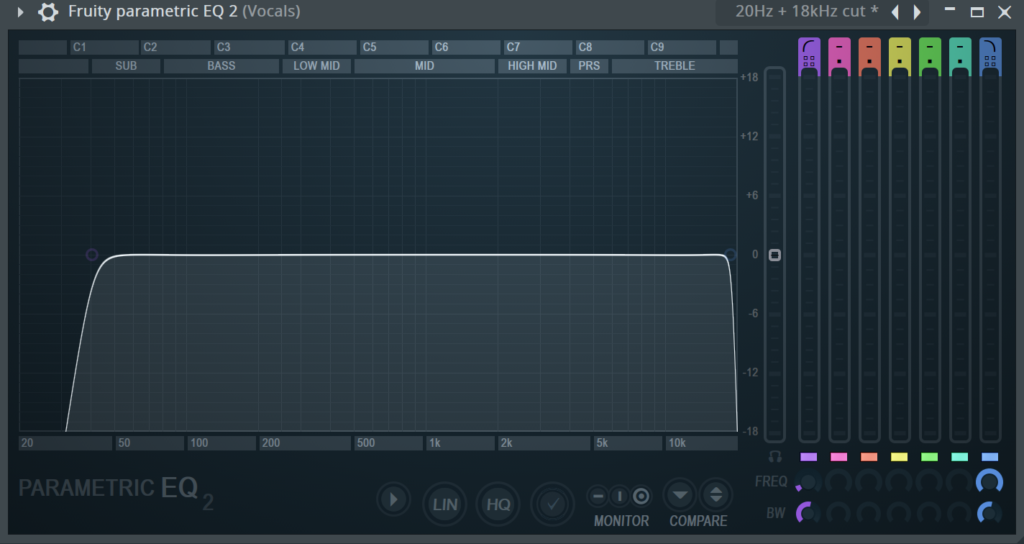
2. Trim your lows to make more headroom
Add a low cut and keep everything below 40 Hz. It will eliminate inaudible frequencies and will bring space for headroom in the mix. You need to add a Fruity Parametric EQ 2 and then apply a low cut.

3. Utilize the Riff Machine
At times, you may not feel inspired to do something. The Riff machine is just what you’re looking for. On its own, the Riff machine generates tunes in the Piano roll.
With areas for making progressions, chords, and arpeggios, as well as features like reflecting patterns, changing levels, and more. You can get started manufacturing bangers immediately!
4. Automatic backups every 5 minutes
Backup is very important to any project, especially in using the software. Setting an auto backup will save your time and will provide you peace of mind.
To set the automatic backup on your FL Studio, go to the menu bar and scroll to File Settings. Under Backup, you can set to Frequently – every 5mins. This is to ensure that if you make a mistake and you can revert the project 5 mins prior.

5. Have a habit to use the Smart Finder
It’s quite overwhelming to have hundreds of libraries with samples. Smart Finder makes it easy for you to locate your favorite samples. Just press “Ctrl+F” on Windows or “Command + F” on macOS” a pop-up finder that you can search the name of your desired sample. It is just easy, and FL Studio will do the hard work for you.
6. Automating the primary faders on the mixer channel is a BIG NO!
Why? When there’s an automation clip on a mixer fader, it becomes hard to make little adjustments to the fader value, without the means of producing another automation clip. And If you’re using a MIDI controller to control these faders, this can cause a lot of problems.
Adding a basic volume or level plugin to the mixer channel’s last effect slot is a far more effective technique to automate the volume of the mixer channel (e.g. Fruity PanOMatic). Then use this plugin to automate the volume, leaving the mixer volume fader unaffected by the automation.
7. Adding Saturation to the mix
Saturation is one of the simplest methods to make anything sound more powerful, professional, and alive.
With Maximus, you can add also some small saturation per band. With the threshold, you can pick between two modes: Mode A or Mode B, and by moving the dial left or right from the center, you may choose what percentage of the mode you want to add. When you start reducing the ceiling dial, you’ll see that it adds saturation to the band.
8. Tempo Tapper
This is a good feature for producing the right temp on your remix. In FL Studio you can identify the tempo of the audio stem. You just have to ‘Right-click the Tempo panel and click on ‘Tap’.
By continually clicking on the grey box in the Tempo tapper window, you can tap along with the audio of the track. This can be repeated until the metronome is in sync.
You can also check Tempo Tappers on other websites, like this one:
https://taptempo.io/
9. Duplicate Mixer Channel State
There’s a really clever technique to achieve this if you have a mixer channel with multiple effect plugins and want to instantaneously copy these effects to another channel.
Drag this option onto any mixer channel and all your plugins and settings will be replicated. Right-click on the mixer channel you wish to duplicate and left-click+hold Save mixer track state as…
10. Dither and Export
When you’re satisfied with your mastering, go to File > Export to apply dither to your exported song. Decide on a format. Choosing a lossless format, like WAV, is probably the best option. After that, give the file a name and save it. It will open a dialog window for rendering. To get the greatest audio results, expand the quality area and make sure to enable Dithering and HQ (High Quality) for all plugins.
Conclusion
These are just a few tips for getting the most out of FL Studio’s mastering tools. In your future mastering sessions, give them a try.
Do you have any FL Studio tips that we haven’t covered yet? Leave your thoughts in the box below.


